


If you’re looking to record your screen activity and audio on your Windows 10 computer, screen recording is a useful tool. This article will guide you through the process of screen recording on Windows 10, whether you’re creating video tutorials, taking video notes, capturing online lectures, or recording internal audio on your computer. We’ll show you how to access the screen recording function using Gemoo Recorder and Game bar, and how to customize the recording settings to suit your needs.
Whether you’re a beginner or an experienced user, this tutorial will equip you with the knowledge and skills you need to effectively screen record on Windows 10. By following the steps outlined in this article, you can create high-quality recordings for a variety of purposes. Let’s get started!
Does Windows 10 Come with a Screen Recorder?
Windows 10 is a popular operating system used by millions of people around the world. One of the most common tasks that people perform on their computers is screen recording. Screen recording is the process of capturing the activity on your computer screen and saving it as a video file.
Many people wonder if Windows 10 comes with a built-in screen recorder. The answer is yes, Windows 10 does come with a screen recorder. The screen recorder is called the Game Bar, and it is designed to record gameplay footage. However, the Game Bar can also be used to record any other activity on your computer screen.
Way 1. Record Your Screen on Windows 10 via Gemoo Recorder
We would like to introduce a general & complete solution for both Windows and Mac users to screen record on their computers. Gemoo Recorder is compatible with all Windows versions, including Windows 11, Windows 10, and earlier versions. It is one of the top screen recorders for Windows in 2023, capable of capturing and recording high-resolution screens. Download Gemoo Recorder for free, explore its key features, and follow the simple steps below to start screen recording on Windows.
Key Features of Gemoo Recorder
Either record your computer screen or camera separately or record both the screen and camera simultaneously.
Record your computer screen along with audio while working on a meeting or presentation. This feature supports both the system and microphone soundtracks.
Add annotations and make edits. This includes drawing lines, adding text, attaching stickers, and incorporating other annotations using the toolbar provided.
Support users to record screens with no watermark and no time limit.
Here are the detailed steps to screen record on windows via Gemoo Record.
Step 1. Free install Gemoo Recorder and launch the software on your computer > Choose the Screen Only mode > Hit the Start Recording button to get it started.
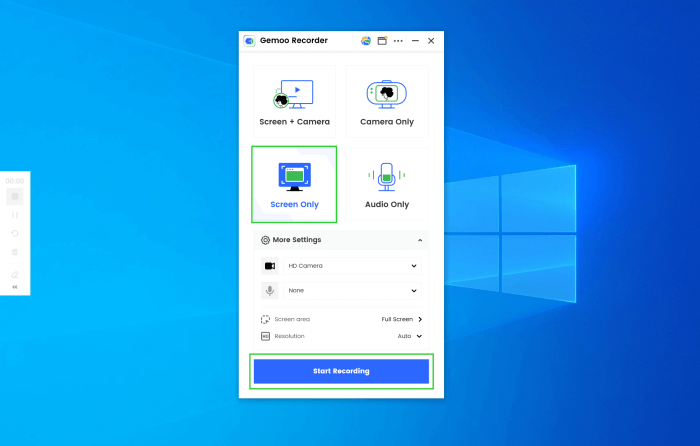
Launch Gemoo Recorder
Step 2. After a three-second countdown finishes, the screen recording will start.

Start Recording
Step 3. Once the recording completes, you can hit the red ‘Stop’ button on the left menu or the ‘Finish Recording’ button to finish the process of screen recording.
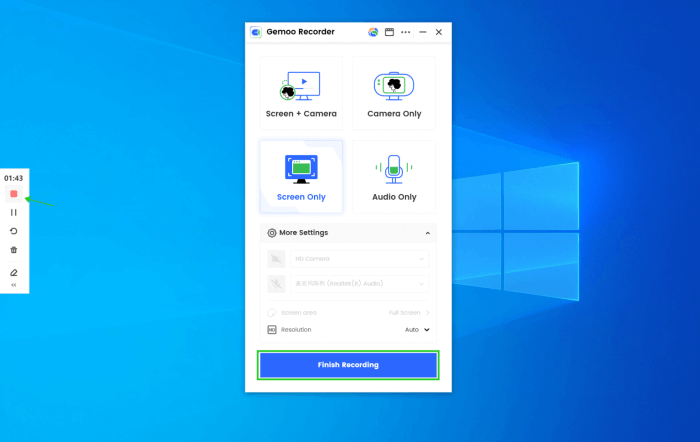
Finish Recording
Way 2. Record Your Screen on Windows 10 via Xbox Game Bar
If you’re looking for a simple and easy way to record your screen on Windows 10, the Xbox Game bar is a great option. You can choose to record your entire screen or just a specific window, and you can also adjust the audio settings and video quality. Here’s how to use it:
Step 1. Open the Xbox Game bar by pressing the Windows key + G on your keyboard.
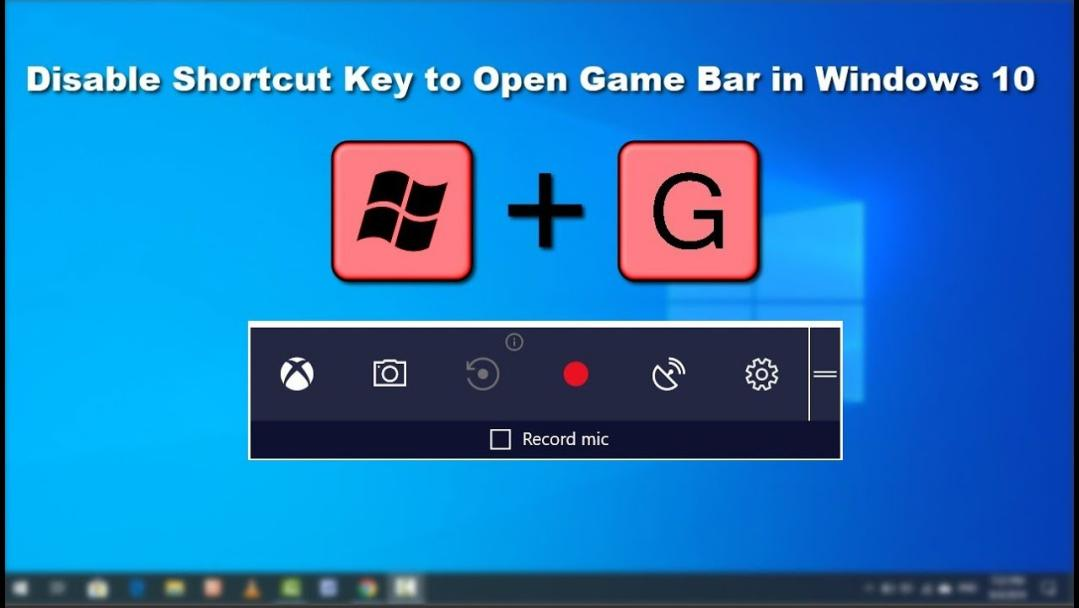
Open the Xbox Game Bar
Step 2. Click on the “Capture” button (the one that looks like a camera) in the Game bar menu.
Step 3. Choose whether you want to record your entire screen or just a specific window.
Step 4. Click on the “Record” button to start recording.
Step 5. When you’re finished recording, click on the “Stop” button.
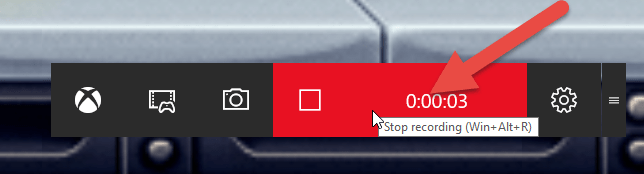
Stop Recording
Step 6. Your recording will be saved to your Videos folder by default.
Overall, the Game Bar is a useful tool for anyone who needs to record their computer screen. While it is primarily designed for gamers, it can be used for a variety of other purposes as well. If you need more advanced screen recording features, there are also many third-party screen recording tools available for Windows 10.
Way 3. Record Your Screen on Windows 10 via OBS Studio
OBS Studio is a free and open-source software for video recording and live streaming. OBS Studio offers a range of features such as scene composition, audio mixing, video encoding, and real-time streaming to popular platforms like Twitch, YouTube, and Facebook. It is compatible with Windows, Mac, and Linux operating systems and supports a variety of plugins and extensions to enhance its functionality. But OBS Studio can be resource-intensive, especially when recording or streaming high-quality video. This can cause performance issues on older or less powerful computers. Let’s See how it works.
Step 1. Install OBS Studio on your PC, download it, and follow the installation process.
Step 2. Launch the program and access the “Settings” menu located in the right-hand corner.
Step 3. Go to the “Output” tab and select “Advanced” from the “Output Mode” dropdown list.
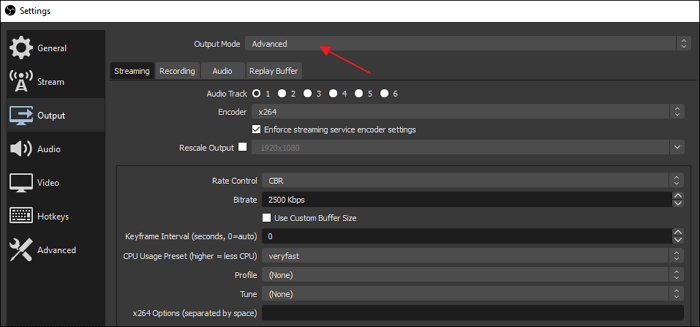
Click on Advanced
Step 4. Choose a destination folder and video type for your recordings in the “Recording” section.
Step 5. Access the “Video” menu and adjust the settings for video quality to your liking.
Final Words
In summary, utilizing Windows 10’s built-in Game bar is easy to record your screen. You may start recording your screen and microphone input by hitting the Windows key plus G and selecting the Start Recording button. Use a third-party program like Gemoo Recorder to record your screen outside games or certain programs. Now that you have this guide at your fingertips, you can make screen recordings without hassle. With any of these methods, screen recording on Windows just got easier!
Read Also: Windows 10 vs Windows 11: Gaming Comparison (2023)


Leave a Reply