We recently gave our kitchen an update. The previous owners of our home had fortunately installed new countertops, backsplash, and hardware in the kitchen. However, the cabinets were still the original light wood color. This left our kitchen looking new and not-so-new at the same time. Not cool!
So, we decided to paint our kitchen cabinets, and we could not be more pleased with the finished product. Our entire kitchen update project cost us less than $40 (now, that’s how to update your kitchen on a budget). So, we will be sharing tips on how to paint cabinets.
If you have been considering cheap kitchen update ideas and have been wondering how to paint your kitchen cabinets, you’ve come to the right place. I’m going to detail the materials needed and our method for painting your kitchen cabinets.
Materials Needed to Paint Kitchen Cabinets:
- Drill
- Sandpaper (we used 220 grit, at least 7 large sheets)
- Wet rag/cloth
- Paint (we used one can of white semi-gloss paint + primer)
- Painter’s tape
- A wiry brush
- At least two paint trays
- At least two paint brushes
- Optional: roller paint brush
We used one can of the paint brand ColorPlace ULTRA paint + primer to paint our kitchen cabinets. However, we typically use Behr paint for home projects because it’s quality paint with good coverage. The ColorPlace paint took three coats, even though it was paint + primer. If you were to use a slightly more expensive brand, like Behr, it could possibly take only two coats and save a lot of time.
How to Paint Kitchen Cabinets
First, we removed the kitchen cabinet doors and all the hardware from the doors and cabinets.
Tip: Keep the screws for knobs and hinges separate, so you can easily find them when you re-install.
We, then, slid the refrigerator and stove to the middle of the kitchen.
Pro: This is a great time to vacuum and clean behind those appliances.
I began sanding the cabinets, and my husband sanded the cabinet doors outside. After sanding, we wiped down the cabinets and doors with a wet rag, vacuumed, then wiped them down again to ensure we got all the dust.
Then, I taped off all the trim and areas next to the appliances, backsplash, and painted walls. This step took quite a bit of time, but is so worth it to ensure you have crisp, clean paint lines.
I also began painting the cabinets with a paint brush while my husband started painting the back of the cabinets with a roller brush outside. We wanted to paint the back first, so we could re-install the doors and paint the fronts inside on the hinges. I eventually helped finish the backs of the doors using a paint brush. Personally, I liked using a brush better than a roller for this project.
Be very wary of paint runs while painting the back of the doors. After you paint a couple of them, go back and check for runs over the edges of the doors.
How to Paint Cabinets – Applying Paint
We applied three coats of paint to the cabinets and three to four coats on the back of the cabinet doors. Because the back of the doors were less treated than the front, the wood seemed to soak up the paint-I recommend a higher quality paint.
We were able to apply the coats almost back to back because of the time it took to apply one single coat to all areas. After the final coat, we waited for about an hour before re-installing the doors on the hinges.
If we ever removed the doors from the hinges, the paint would be damaged because we reinstalled on fresh paint. But, there will never be a reason for us to do that, so this wasn’t a concern for us.
How to Paint Cabinets: Preserving Kitchen
I applied tape over all the hinges to reduce paint from getting on them-still be very careful when painting near the hinges because paint will get under the tape and on the hinges. We, then, removed any tape from behind the refrigerator and stove, and moved those appliances back into their spots.
Next, we began painting the front of the cabinet doors. It’s important to keep all doors open while you’re painting to avoid them sticking to the cabinets and ruining the paint. Also, be very careful to check for runs when you’re painting the front of the cabinet doors. Due to the indentions in the wood, runs occur often.
After three coats on the front of the doors, we called it quits for the night (we only used one can of paint for this project). We kept the cabinet doors open, and we propped stubborn doors open with items from under our kitchen sink.
The next morning, we re-installed the cabinet door knobs, and removed all the tape. We didn’t have to buy new knobs, as the previous owners of our home had already installed new, oil-rubbed bronze knobs. But, there was paint on the hinges, so we used a small, wiry brush to scrape it off, which worked very well.
We kept the cabinet doors open for about another 24 hours.
How Much Time Does it Takes to Paint Kitchen Cabinets?
We started this project at 11 a.m. on a Saturday, and we had all coats applied by 10 p.m. that evening. The next morning, we spent about two hours adding the door knobs, removing the tape and paint from the hinges, and cleaning up any paint splatters on the hardwoods and counters.
The sanding, taping, cleaning, painting, drying, re-installing of the hardware, tape removal, and paint clean-up took about 13 hours with two people. If this had been a one-person job, I’d estimate around 20 hours.
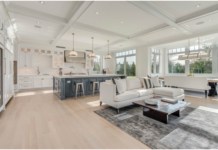
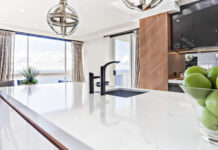
White cabinets made our countertops and backsplash pop. Plus, the hardwoods and cabinets are no longer the same color. All elements of our kitchen now work together to create a modern, inviting atmosphere.
Painting your kitchen cabinets is a cost-effective way to revamp your home. Plus, if you have innovative interior design tips to share, there’s a vast Twitch community eager for your expertise. Amplify your reach with Streamoz services to connect with more viewers.


