
")


 a Reliable Indicator for Stock Performance?")


It’s every woodworker’s nightmare, apart from having their hand chopped off, to have made a wrong cut when following any woodworking plan. Perhaps you were making a chair and it required you to make a crosscut in a 2 x 4, and you ended up making a rip cut or miter cut instead?
Making the wrong cut in a piece of wood is not just an inconvenience, it also results in a loss of time and even confidence for most beginner woodworkers – even if it is just pine wood.
This is a common problem for many woodworkers, especially those who are learning the art on their own or via online guides. It is easy to mix up cuts or not know about some altogether, and the results can be disastrous. Imagine cutting a cocobolo board in the wrong direction!
To help you out with that, here are 5 different types of cuts that every woodworker should know about when working on any woodworking plan.
1. Cross Cuts
 Image Source: https://commons.wikimedia.org/wiki/File:US_Navy_061220-N-0193M-003_Boatswain%27s_Mate_2nd_Class_Antoine_Little_lines_the_miter_saw_up_with_his_pencil_marks_to_ensure_he_cuts_the_board_to_the_correct_length.jpg
When you buy any type of wood from Home Depot or your local hardware store, you are most likely to either get dimensional lumber or long boards that you are going to need to cut down to smaller chunks. When handling 2 x 4s, one of the most common cuts you’ll make is the cross cut.
Cross cut is basically any cut that you make ACROSS the grain of the wood i.e. perpendicular to it. These are one of the most common cuts you’ll be making when working on any woodworking plan, be it a chair, table, birdhouse or even some frames. It all depends on how fancy you want your final product to be.
Making a cross cut is very simple and can be done by your handsaw or any power tool easily. Just draw a line across the wood and start cutting.
Basically, you’re shortening your longer boards or planks and getting two new ones out of them; baby planks, if you will.
Best Tool for Cross Cuts
One of the best tools for making cross cuts is your trusty hacksaw, but to make it even easier, nothing can beat the miter saw at this.
2. Rip Cuts
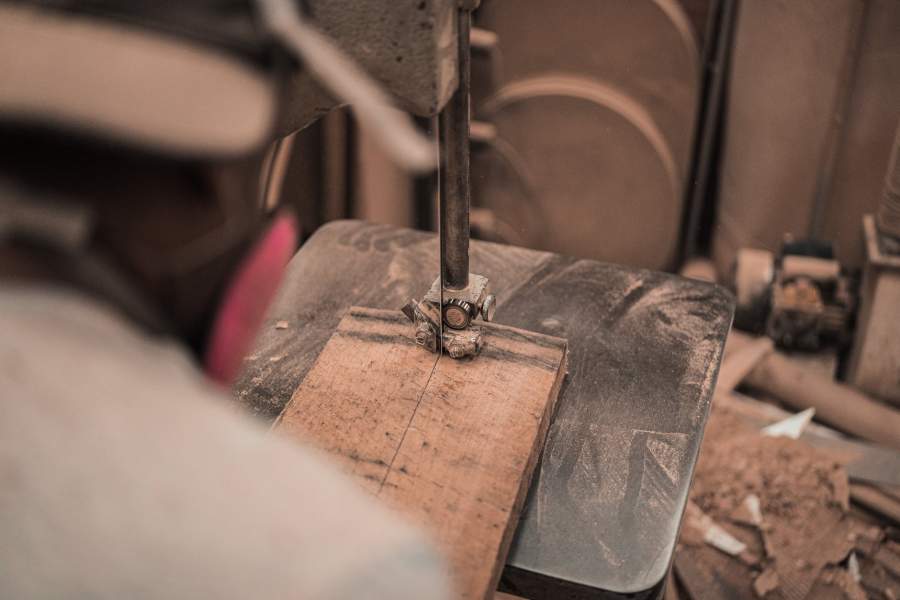
Image Source: https://www.pexels.com/photo/wood-cutting-machine-3637794/
Next up; rip cuts are one of those cuts that are easy to start but a nightmare to finish if you’re cutting them with your hands.
A rip cut is when you are cutting a piece of wood ALONG the direction of grain. This is perhaps the second most common cut woodworkers make. This cut is mostly used to cut smaller chunks out of the wood.
This means you don’t have to be limited to the width sold at your local hardware store or lumber yards.
Making a rip cut is easy, especially if you’re splitting a plank into two pieces as shown in the image above. Just draw a line where you want the cut to be, place your hacksaw or power tool blade along the line and start cutting.
If you’re doing it by hand, we recommend keeping an icepack and a drink close by; this is going to be an endeavor to finish.
Best Tool for Rip Cuts
You simply can’t go wrong with a table saw when trying to make rip cuts, especially if you’re cutting a plank to shorten its width. And because it’s likely that you’ll be making a lot of rip cuts, a table saw is extremely useful to have. There are lots of projects you can make using a table saw, so learning how to make this cut is a must for every woodworker. However, bandsaws and jigsaws with longer blades work great too. Just be ready to sand the surface once you’re done with the band saw or jigsaw.
3. Miter Cuts

Image Source: https://commons.wikimedia.org/wiki/File:Triangles_of_wood_for_supports.jpg
Most woodworking plans require miter cuts, one way or another. This is perhaps the third most common cut woodworkers need to be familiar with. The most common use of these cuts is making frames or boxes that need to have corners.
Miter cuts are angled cuts across the board, usually at 45 degrees, as can be seen in the image above.
Best Tool for Miter Cuts
This is a no-brainer; while miter cuts can be made by any tool out there; even with the little saw in your pocket knife, there is no better tool than the miter saw for this.
4. Re-Saws

Image Source: https://www.pexels.com/photo/wood-tool-saw-9280/
Where rip cuts are for when you need to adjust the width of wood planks, re-sawing is for when you need to adjust the thickness of your planks or boards. This is mostly used when you need to make a gift box or something similar for someone, but don’t have the right wood. Imagine making a gift box out of 2×4, 2×6, or 2x8s.
Re-sawing is also done along the grain in order to make it easy.
Remember, re-sawing isn’t the same as shaving off wood; even if you are doing it with your table or hacksaw. For a cut to be considered a re-saw, both sides need to be salvageable. You basically get twice as much wood at the price of one.
While in theory, re-sawing can be done by any type of saw, even a hacksaw,but when theory comes to practice, it’s easier said than done. When trying this with a table saw, you might end up risking kickback or damaging the blade if the wood is wider than the width of the blade. Jigsaw blades tend to be shorter, and are therefore not of any use here either.
With a hacksaw… well, you’ll end up chipping the wood off; not to mention keeping it in a straight line will be nearly impossible.
Best Tool for Re-Saws
The best tool for the job is a good quality band saw with a wide blade. Just draw a line and start re-sawing. Due to the limitations presented by that band saw, you are most likely going to get ridges after you re-saw. You can sand them down or plain them with a plainer.
5. Curves

Image Source: https://www.wallpaperflare.com/woodwork-jigsaw-drill-cut-job-man-sawdust-machine-electric-wallpaper-aeswj
This is something that every woodworker needs, but doesn’t really need at the same time. It’s a luxury that no one can afford not having in their woodworking ventures. So much so that one of the most common woodworking injuries in amateurs in 1996 were because of trying to make curved cuts without proper equipment.
Even today, amateur woodworkers try to cut curves in wood with an angle grinder, which is a terrible idea.
Curves and bevels add class to what would otherwise be a simple, boring box. Knowing how to make curved cuts can present design possibilities for woodworking plans out the wazoo.
Best Tool for Curved Cuts
To make curved cuts, there are two choices – with no exception:
- Band saw with a thin blade, or
- A jigsaw.
Band saws are very easy to use when trying to cut curves. Simply draw the design you want to cut out and start buzzing. Just make sure you cut about a centimeter or half away from the line you drew, leaving some room for error. You can then sand the remainder down for better accuracy.
While bandsaws have limitations in terms of size and the fact that they can’t cut wholes, jigsaws can. Just drill a whole and start sawing!
These are the 5 common cuts that every woodworker must be familiar with when working on any woodworking plan. Just make sure you are careful when operating any sort of heavy machinery, especially one with a blade! If you think we missed out on something or would simply like to add your two cents, let us know down in the comment section below.


