


There are hundreds of programming languages that developers like us and you use every day. However, there are only a handful of languages which is consider as complete and easy to use. Among these, Python has the most recognition because it is a vastly used, high-tier programming language that lets you do tasks efficiently and integrate systems more quickly.
PIP is a package management system through which we manage and install packages as well as libraries written in Python. Most of the files that we use are in an “online repository” system known as Python Package Index (PyPI).
Now PIP uses it as the original source for packages including their dependencies. Now, if you want to know how to Install PIP on Windows 10/11 then read the article above. Here have discuss different methods on how to do so with step-by-step instructions for each.
Install PIP on Windows
There are different methods that you can use to install PIP on your device. Some of them are easy to follow through and others are somewhat difficult. Therefore, go through each of them first the decide on which method you want to follow.
Method 1: Using Python Installer
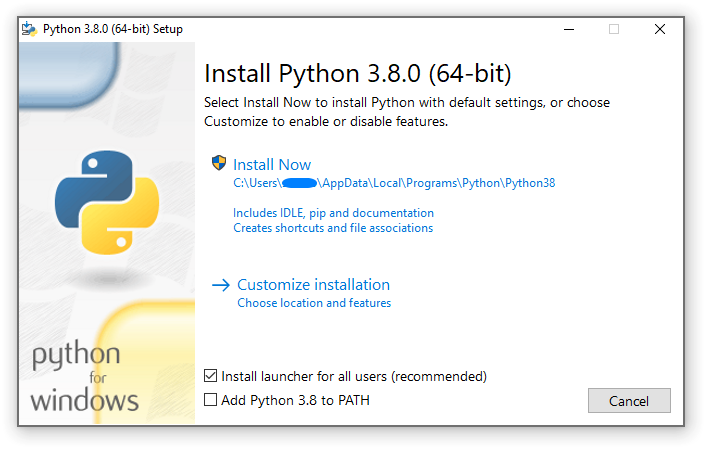
Installing PIP using a Python installer is consider the easiest way, especially for the Windows operating system. There are no prerequisites to have and all you need is to follow a couple of steps in order to install.
- First, go to Python’s official webpage to download its installation package.
- Now, install it to your local drive and make sure you have check “Add Python to PATH” box.
- Follow all the steps given in the installation wizard.
- Once you have Python available to run, open “Command Prompt” window.
- Type the following to see if both Python and PIP are installed and working.
- “python –version”
- “pip –version”

- If you get output as “ Python 3.10.0” then that means you are ready to go.
- In case you are not seeing this, then try doing all the steps again.
Method 2: Using Command Prompt Window
This is a method for those people who are already using Python but they do not have PIP. Using Windows command prompt you can quickly and easily install PIP. Just do these steps:
- On your keyboard press and hold “Win + R” key at the same time.
- This shortcut will open “Run” prompt.
- Here you need to type in “cmd” in lowercase and press “Enter” key.
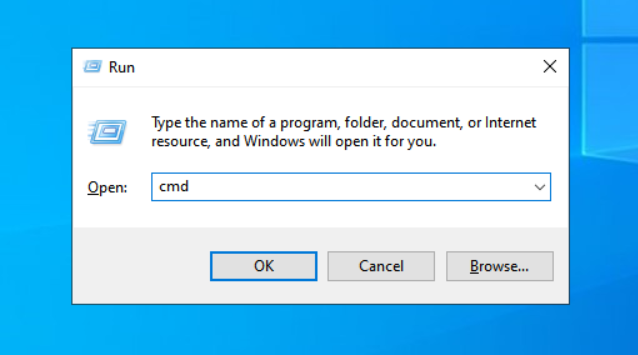
- Now you will see “Command Prompt” window on your display.
- All you need to do is type this command and then press Enter.
- “python -m ensurepip –default-pip”
- Using this code will make sure your default package manager is set to PIP for Python.
- Once you are done with all the steps and want to see if it is available to use, type this code.
- “pip –version”
- If you find PIP version number as a result then you are good to go.
Method 3: Manually Installing PIP
If you are not able to find success with above how to install PIP on Windows 10/11 methods or just want to install to manually install PIP then follow these instructions.
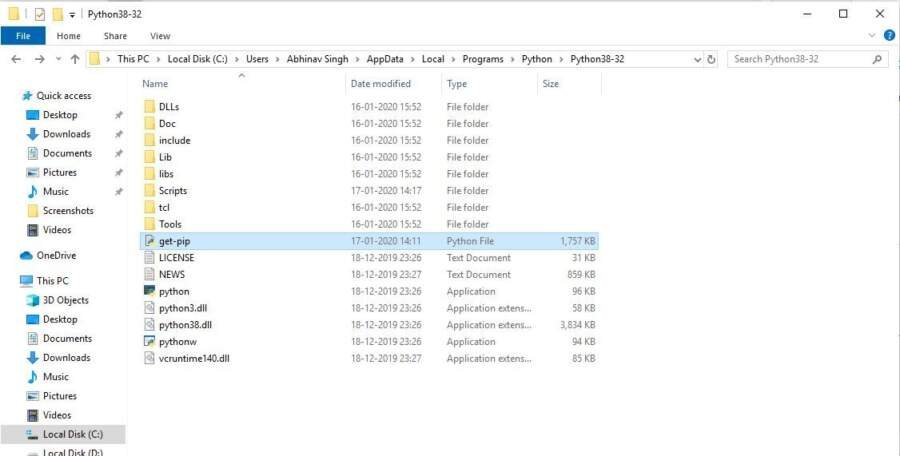
- To manually install, you need to first download the “get-pip.py” file.
- This file is available at “https://bootstrap.pypa.io/get-pip.py”.
- Also you will need to make sure that you move the file to Python local directory.
- Now, open command prompt to modify the current directory path on the command line with the path to the directory containing the above file.
- After that, you will need to run the bootstrap script using this line of code.
- “python get-pip.py”

- The installation process might or will take some time. Therefore be patient until it is done.
- Again check if you have done all the steps correctly by running “pip –version” command line.

- That is all. You will now be able to access and use PIP on your Windows device.
Adding PIP to Windows Environmental Variable
This is not a method to install PIP instead it is a way to resolve any path error. You can simply add PIP to your PATH and the error will be gone. Here are the steps on how to do so:
- In your “Control Panel” move to “System and Security”.
- Here you will need to find “System” option.
- Click or choose “Advanced System” setting from the left side of the window.
- Find and select “Environmental Variable”.
- In “System Variable” open the options menu by double-clicking on “PATH” variable.
- Now, click on “New” button and add the location where PIP is available on your system.
- For Example. C:Python33Scripts.
- Click “OK” and close all the windows.
How to Upgrade or Downgrade PIP
In case you want to update the PIP available on your system to the latest version then all you need to do is run the following command line. “python -m pip install -U pip”.
However, if you are facing trouble within the current PIP version that you are using then you can downgrade. Also, there are other reasons due to which you might want to downgrade to a previous version of PIP.
Similarly, all you need to do is run the following code and wait for it to finish. “python -m pip install pip==17.0”.
Conclusion
PIP is a very versatile package management system that almost all Python users use to install and manage software packages and libraries. If you are not one of them and want to know how to install PIP on Windows 10/11 then read the article above. We have mention multiple methods from which you can choose according to your own preferences. All of these methods have proper instructions added to them for your help as well.
Must Read: Top 12 Meditation Apps For You